| Excerpt |
|---|
This page contains instructions on how you can manage SIP devices from the interface. |
| Table of Contents | ||
|---|---|---|
|
Overview
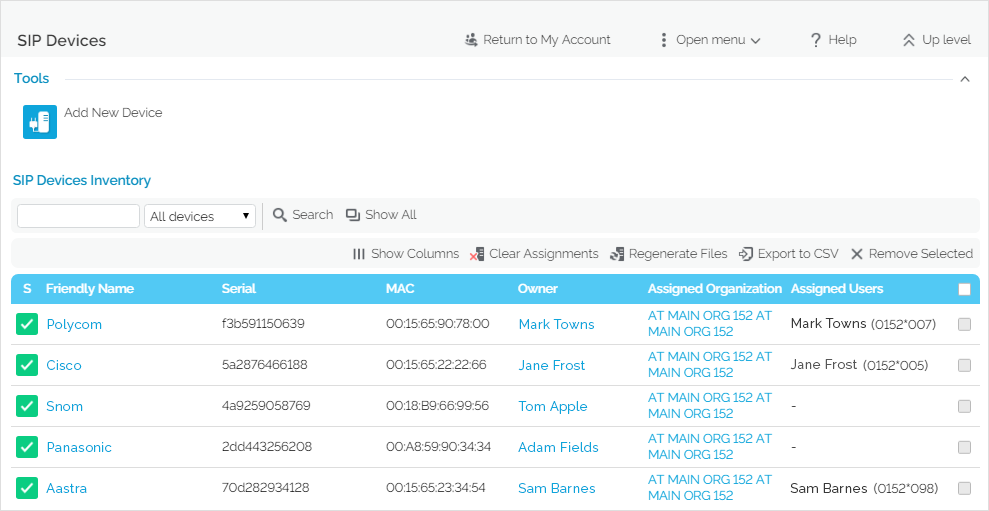
When logged in the VoipNow interface, click on SIP Devices under Telephony Provisioning and you'll be redirected to the SIP Devices page.
The SIP Devices Inventory lists the provisioned SIP devices taking into consideration the level of the authenticated VoipNow user.
| Authenticated System Admin | Authenticated Service Provider | Authenticated Organization | Authenticated User |
|---|---|---|---|
| Can see all existing SIP devices. |
|
|
|
Here are the operations you can perform on such devices.
Enable or disable a SIP device
All SIP devices are listed in the SIP Devices Inventory. You can enable or disable a device with a simple click on the S icon showing the status of the device:  for enabled/the device is provisioned
  for disabled/the device is not provisioned.
...
- Select checkbox(es) corresponding to the device(s) you want to unassign.
- Click the Clear assignments link. This will automaticall automatically unassign the device.
Regenerate files
...
- Select the checkbox(es) corresponding to the device(s) you want to reprovision.
- Click the Regenerate files link. This will automatically regenerate the files.
...
- Enter the name of the template in the text box located above the table.
- Click the

 Search button. The system remembers the search criteria when a new search is performed and even after the user logs out.
...
- Select the device from the inventory and click the Remove selected link on top of the table.
- Select the Confirm removal checkbox and click OK. To return to the previous page without removing the device, click Cancel.
| 4psarelated | ||
|---|---|---|
|
...
| |
| Hiddenlabel |
|---|
voipnow300_pbx/options/provision/provision_device |
...
 Except where otherwise noted, content in this space is licensed under a Creative Commons Attribution 4.0 International.