| Excerpt |
|---|
| This page contains instructions on how to install VoipNow on VMware vSphere. |
| Table of Contents | ||
|---|---|---|
|
| 4psahelpbox | ||
|---|---|---|
| ||
If something is unclear or you need further assistance, do not hesitate to open a ticket in the 4PSA Support Zone or ask a question in our monitored GetSatisfaction community. |
Requirements
We highly recommend VMware vSphere 6.0 or newer versions for production environments. For testing purposes, you may use VMware Player.
To meet VoipNow's performance and computing requirements, the virtual machine must have the following configuration:
- Memory: 6GB (or more)
- CPUs: 4 (or more)
- SCSI controller: Paravirtual
- Network adapter: VMXNET 3
- HDD: 160GB virtual disk (or more)
- CDROM: yes
- Guest Operating System: Linux (Redhat Enterprise system 7 or newer)
Installation
In order to install VoipNow, you must download the ISO image from here.
Log in to vSphere portal
Open the browser and access your vSphere portal link and log in using your credentials.

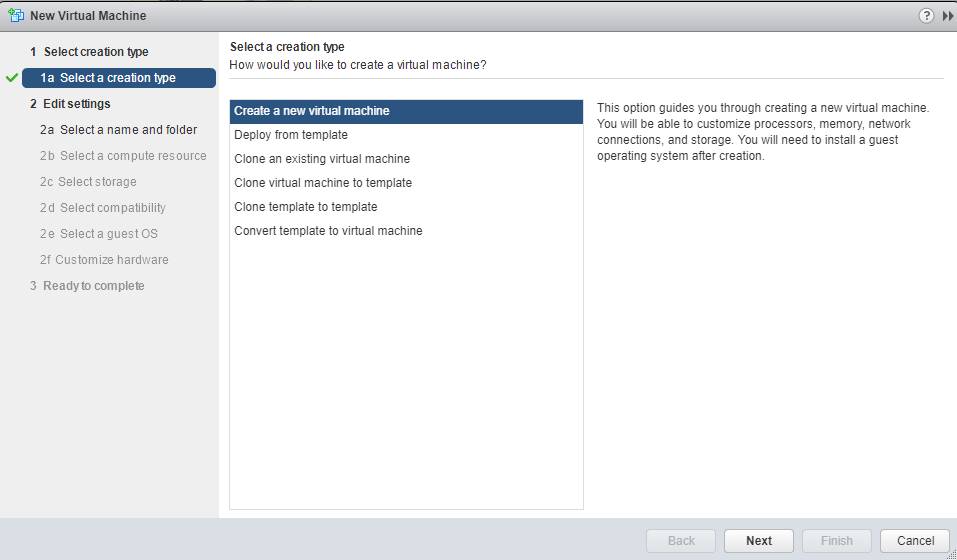
Create a new virtual machine
Go to the datacenter and folder in which you want to create the virtual machine.
When asked what to do, choose to Create a new virtual machine and press Next.
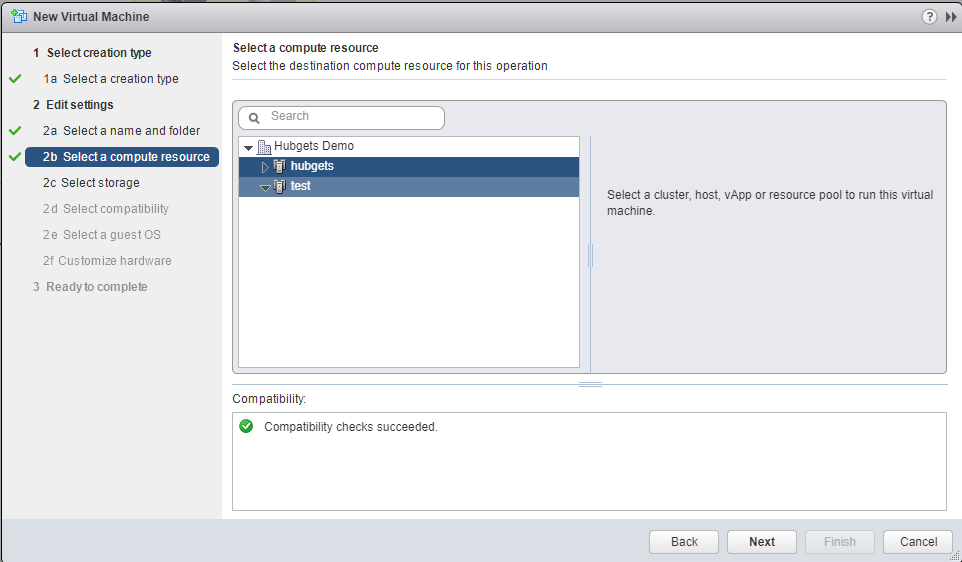
Select the proper folder name, compute resource and storage where you want to create the virtual machine.
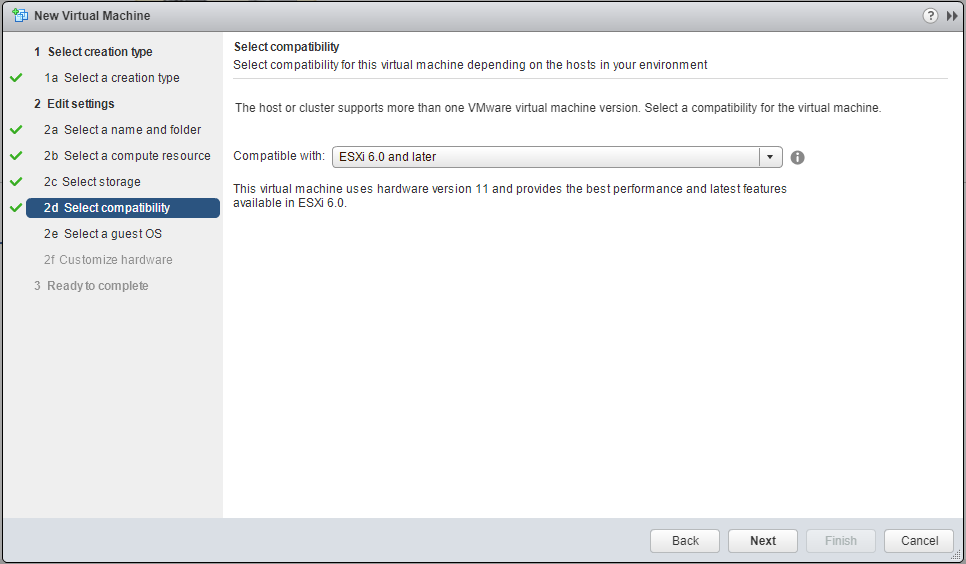
Choose a compatibility level lower than your infrastructure so that you can move the virtual machine at a later time, if necessary.
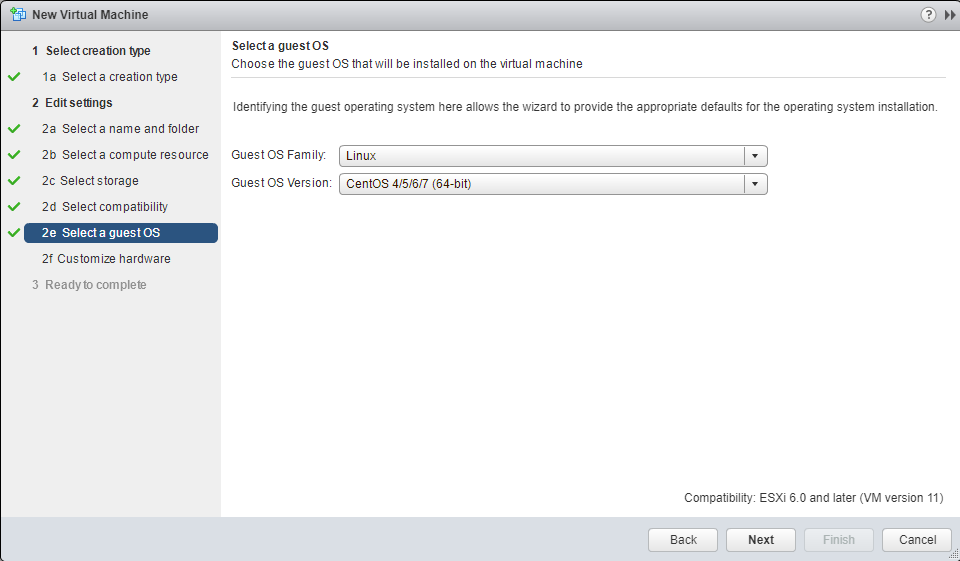
When asked to choose the operating system, select Linux and CentOS 4/5/6/7 64 bit.
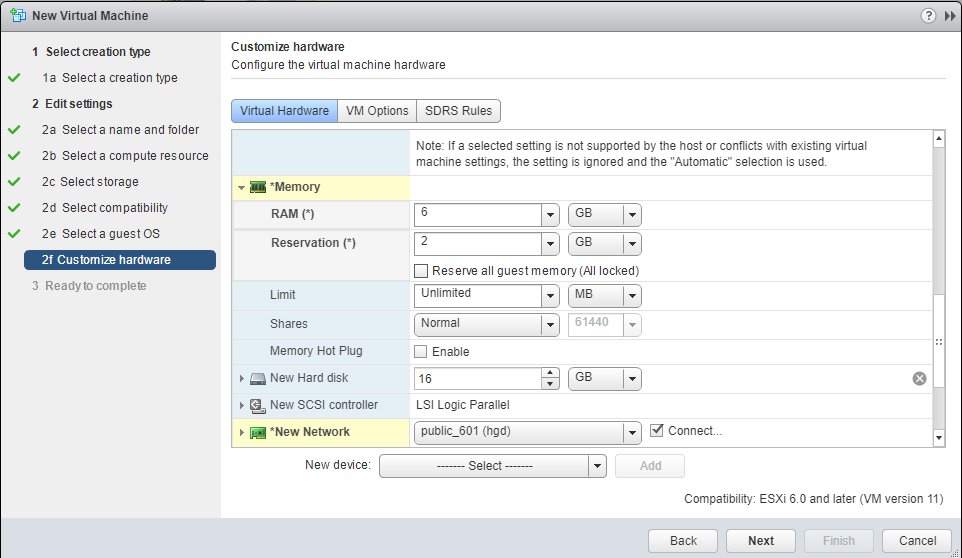
In the Customize Hardware step, select at least 4 CPU (2 sockets and 2 or more Cores).
| Note |
|---|
Always create a reservation for CPU and RAM! |
| Tip |
|---|
Configuring CPU and RAM reservations will make the virtual machine behave properly under load, without skewing time or causing voice traffic issues. |

Customize the Ram memory.
Once you've completed these steps, finish creating the virtual machine.
Upload iso image to datastore
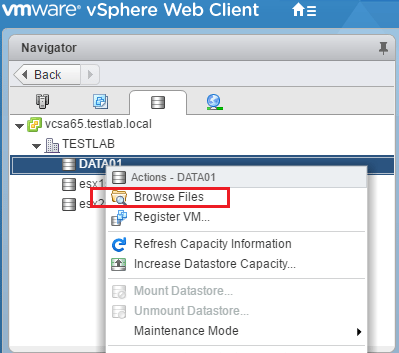
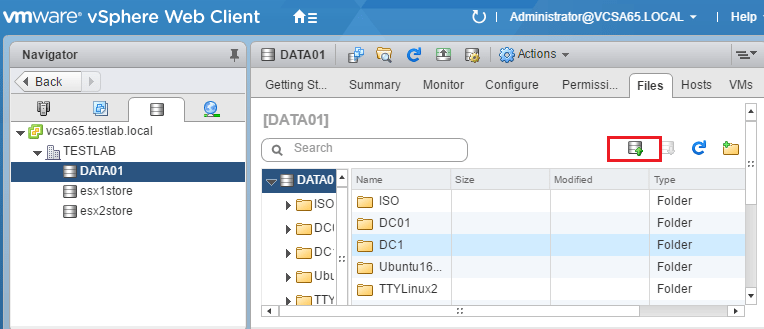
Go to Datastore section and choose the datastore where you want to upload the VoipNow ISO image.
Then upload the file.
Power virtual machine and connect the ISO image
Go to the virtual machines list and select the virtual machine you've just created.
Connect the ISO image from the datastore to the virtual machine.

Start the VoipNow installation
Once the virtual machine has the ISO image attached, and you've opened the virtual machine console, send CTRL+ALT+DELETE (by pressing CTRL+ALT+INSERT on your keyboard or from the CTRL+ALT+DELETE button) so that you can start the VoipNow installation.
Follow the instructions in the ISO Image Installation guide.
 Except where otherwise noted, content in this space is licensed under a Creative Commons Attribution 4.0 International.