

How to set up a master-slave replication in 12 easy steps
WARNING
Applies to VoipNow 3.X and higher!
Every time an API request is sent or a call report is generated, the SQL server receives a query. As a result, the load on the server is affected by the number of requests and the volume of data that should be returned by the SQL server.
By default, VoipNow is able to send all the read requests to a slave node and all the inserts to the master node. Basically, every time a user wants to generate a call report for an entire month, his request will be directed to the slave server. This pattern could cause problems if the replication of the data does not happen in real time and the slave remains behind the master. The MWI and presence notifications in particular are most affected.
To avoid this kind of issues, the latency between those two nodes must be as small as possible. This article will help you set up a replication between two SQL servers.
Step-by-step guide
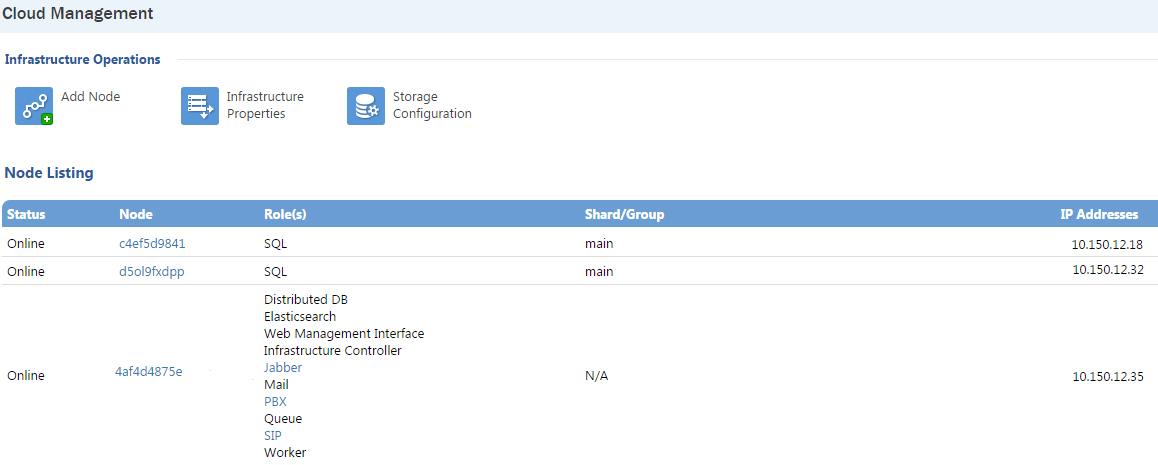
Before taking each step, make sure that you have both SQL nodes installed as recommended in our documentation for distributed environments. Another mandatory condition is that both nodes are Online. Your interface settings should look as shown in the image below.
- Edit MySQL config file on the master server:
/etc/my.cnf. At the end of the file, add the following lines. Then save changes and restart MySQL.
#replication
expire_logs_days=30
server-id = 1
log-bin=/var/lib/mysql/mysql-bin.log
log_bin_trust_function_creators=1
binlog_format=MIXED- Add the MySQL user destined for replication with the appropriate rights. Log in on MySQL CLI and run the following command:
GRANT SELECT, PROCESS, FILE, SUPER, REPLICATION CLIENT, REPLICATION SLAVE, RELOAD ON *.* TO replica@'%' identified by 'password'; FLUSH PRIVILEGES;Password
Replace the password string with a custom, complex password. You can generate one using http://passwordsgenerator.net/ or a similar site.
- Stop the MySQL service on the slave server:
service mysql stop- Go back to the master node and run the following command. In order to synchronize the folders, you will have to provide the root password for connecting via SSH on the slave server.
rsync -varPe ssh /var/lib/mysql root@<slave_ip>:/var/lib/WARNING
Change the <slave_ip> with your SQL slave IP address.
- Lock the database to prevent any new changes.
FLUSH TABLES WITH READ LOCK;- Check status on master server:
mysql> show master status;
+------------------------------+----------+--------------+------------------+
| File                         | Position | Binlog_Do_DB | Binlog_Ignore_DB |
+------------------------------+----------+--------------+------------------+
| centos-6-b64-test-bin.000001 | 43311833 |              |                  |
+------------------------------+----------+--------------+------------------+- Again, synchronize the MySQL home directory on the slave server. Run the rsync command on the master server one more time.
rsync -varPe ssh /var/lib/mysql root@<slave_ip>:/var/lib/- Unlock tables.
UNLOCK TABLES;
QUIT;- Edit MySQL config file on the slave server: /etc/my.cnf. At the end of the file, add the following lines:
expire_logs_days=30
log_bin=/var/lib/mysql/mysql-bin.log
server-id=2
max_allowed_packet=128M
binlog_format=MIXED
log_bin_trust_function_creators=1- Start MySQL service on the slave server, connect to MySQL CLI and run the following command:
stop slave;- Set the master parameters on the slave server.
change master to master_host='<master_ip>', master_user='replica', master_password='<password>', MASTER_LOG_FILE='<log_file>', MASTER_LOG_POS=<position>;WARNING
Replace `<master_ip>` with your SQL master IP address.

Replace `<password>` with the previously generated password.

Replace `<log_file>` with the log file name displayed in step 6 ( `centos-6-b64-test-bin.000001` in our example).

Replace `<position>` with the position index displayed in step 6 ( `43311833` in our example).
Then disable the partition update event and start the slave node:
alter event partition_update disable;
start slave;- Check the slave status.
mysql> show slave status\G;
*************************** 1. row ***************************
..
Slave_IO_Running: Yes
Slave_SQL_Running: Yes
..
Exec_Master_Log_Pos: 43315418
..
INFO
A successful replication is indicated by Slave_IO_Running and Slave_SQL_Running being Yes. If the two parameters have different values, replication is not configured correctly.