| Excerpt |
|---|
This page describes an App that uses UnifiedAPI to send faxes. Download. |
| Table of Contents |
|---|
| Note | ||
|---|---|---|
| ||
Download here. Do not hesitate to contribute in order to make this example better - we welcome Pull Requests!This demonstrative code SHOULD NOT be used in production. It is designed to simply show how an App interacts with UnifiedAPI. From this perspective, validations and error-checks aiming to demonstrate the most common mistakes are minimal and can be done easily. |
Overview
Click2Fax is an App written in PHP that allows anyone to send faxes using the UnifiedAPI. It uses the Fax resource exposed by Unified API and the following request:
- Create Faxes - Send fax to any number without need of approval
...
Installation
In order to be able to use the Click2Fax App, your system must be compliant with the requirement below:
- Your system needs to have PHP 5.3 installed or higher.
- Your VoipNow server must be at least version 3.0
- The extension should be able to send faxes.
Setup
STEP 1: Download the files.
Download the archive, extract the files, and copy them to a directory that can be accessed over the Web.
Switch to the directory that can be accessed over web (e.g /var/www/html) and download the files.
| Shell |
|---|
| git clone https://github.com/4psa/app-click2fax.git |
STEP 2: Proceed to allowing permissions and ownership rights.
You also need to give proper permissions and ownership to the files of the plugin - the plugin needs to be owned by the web server user and group. For example, if we use httpd as a webserver:
| Shell |
|---|
chmod -R 755 <PATH_TO_Click2Fax>chown -R httpd:httpd <PATH_TO_Click2Fax> |
STEP 3STEP 2: Configure the App.
In order to use the App, you must configure it. To do so, you must open the file config.php in the <PATH_TO_Click2FAX>/interface/config/config.php and change the following settings:
...
| Note |
|---|
| Please note that the newly created app will not work properly unless you check the App is trusted option in the Add App form. |
STEP 3: Proceed to allowing permissions and ownership rights.
You also need to give proper permissions and ownership to the files of the plugin - the plugin needs to be owned by the web server user and group. For example, if we use httpd as a webserver:
| Code Block |
|---|
chmod -R 755 <PATH_TO_Click2Fax>
chwon -R httpd:httpd <PATH_TO_Click2Fax>
|
STEP 4: Setup the system.
You also need to make sure the VoipNow system is setup to receive faxes.
...
As soon as the setup process is complete, you can access the interface at https://<IP>/<PATH_TO_CLICK2FAX>/interface/. The page displays a single button that the user can click in order to send the faxes. Once the button is clicked the following form appears:
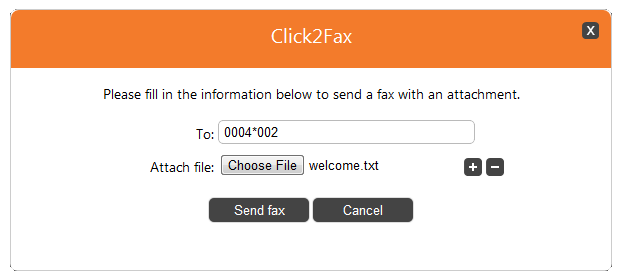
To send the fax a user must enter the information in the form fields as described below:
...
 Except where otherwise noted, content in this space is licensed under a Creative Commons Attribution 4.0 International.