Applies to VoipNow 3 and higher!
X-lite 3.x
STEP 1: Download and install X-Lite, the free version. Once you downloaded the application, install it on your machine.
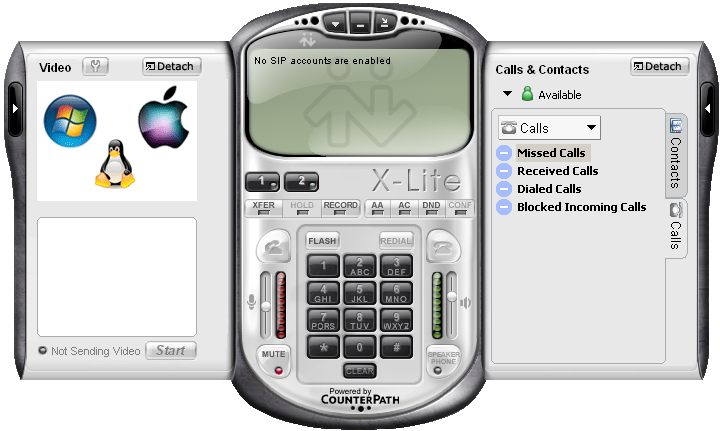
STEP 2: Open X-Lite.
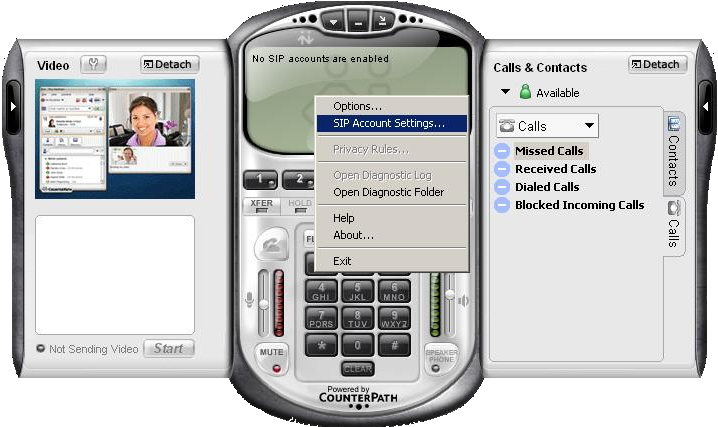
STEP 3: Go to the SIP Accounts tab. Right-click on the main screen and then click SIP Account.
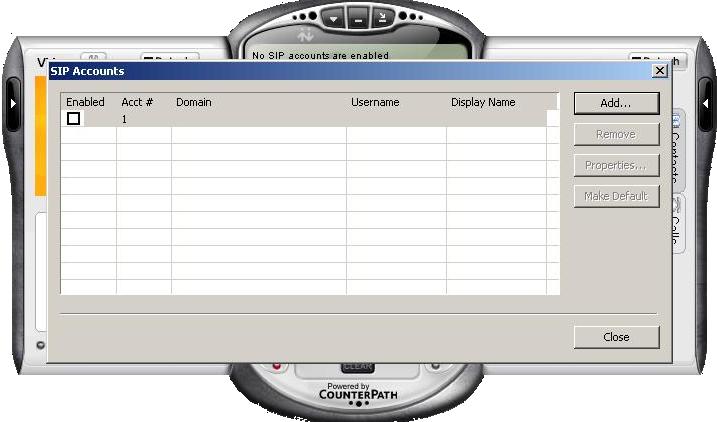
STEP 4: Add a new SIP account with a click on the Add button in the SIP Accounts window.
STEP 5: In the Account tab, fill in the login details following the explanations below.
- Display Name - It can be anything you want, but usually it's a client name.
- Username - This is the extension number, in our case 0003*001.
- Password - This is the password you set in VoipNow, in the Edit Extension page.
- Domain - Please enter the server hostname or IP address.
If you use a hostname, you will have to add it in VoipNow as well, more precisely in the Unified Communications → Zero Priority → SIP → Accept SIP requests to domain:port field.
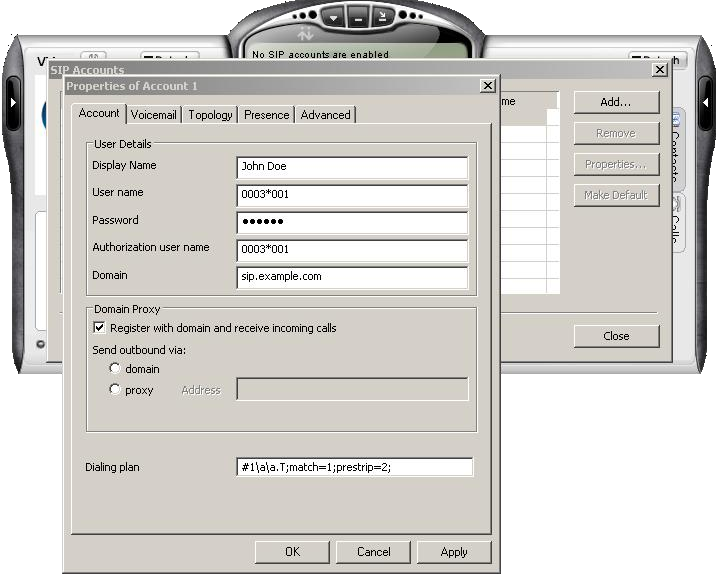
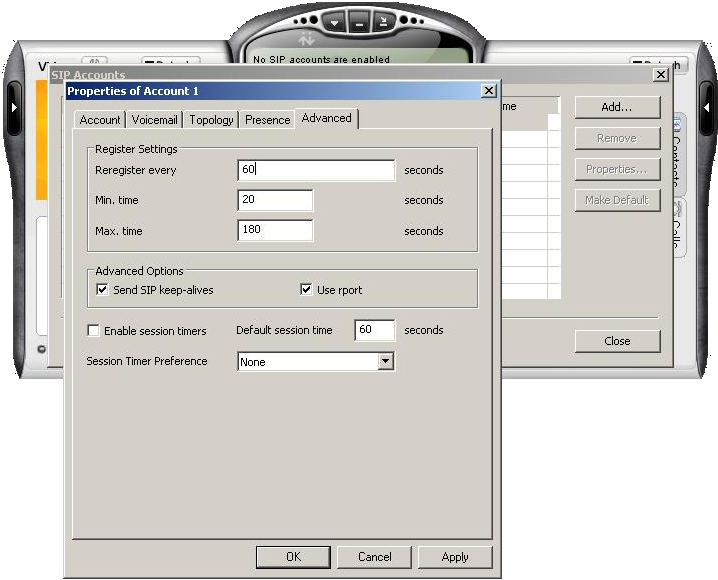
STEP 6: Set the Register every option to 60 seconds. To prevent any registration issues, please go to the Advanced tab and change the Reregister every {x} seconds value to 60 seconds rather than 3,600 seconds.
STEP 7: Activate the account and start using it.
Once you click OK, the account will be created, but not activated. To enable it, select the checkbox available in the first column of the SIP Accounts table.
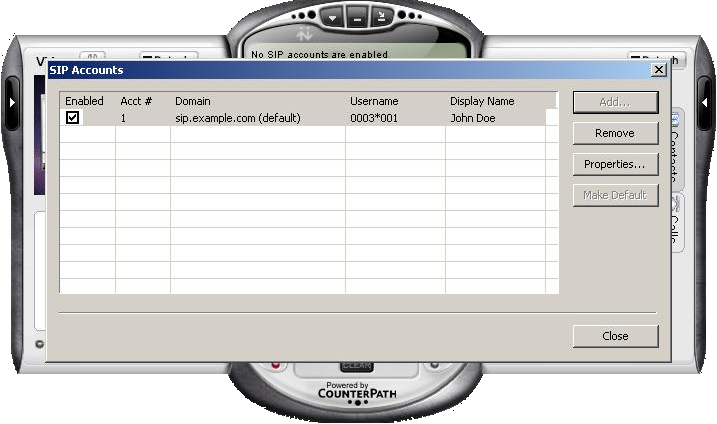
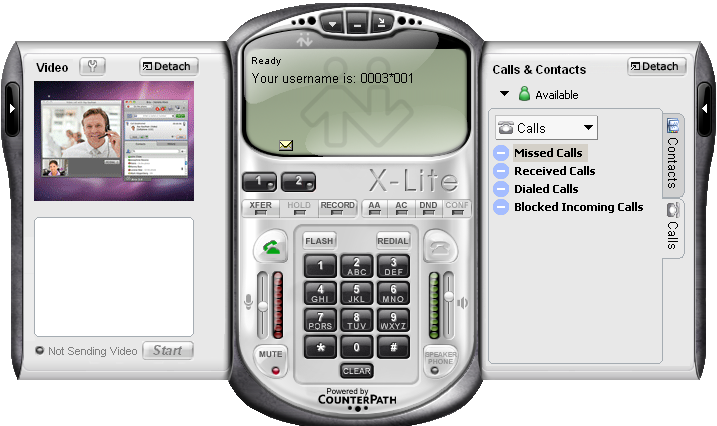
STEP 8: Click Close when you're done. At this point, you should be able to see an output similar to the one below, and you may start dialing.
X-lite 4.x
STEP 1: Download and install X-Lite free version
You can get the X-Lite for free from here. Once you downloaded it, install it on your machine.
STEP 2: Open X-Lite.

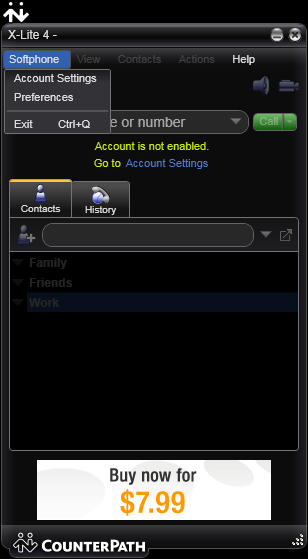
STEP 3: Go to the Softphone → Account Settings menu.
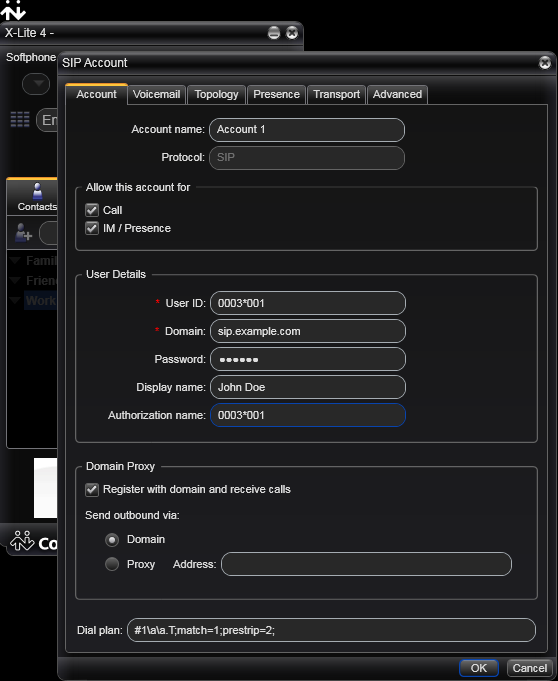
STEP 4: Configure the SIP account following the explanations below.
- Fill in an Account name, for example John Doe or simply Account 1.
- Customize the options in the Allow this account for.
- Call - Select this checkbox so you can make voice/video calls.
- IM/Presence - Select this checkbox so you can see the status of your friends/colleagues - e.g. online, busy, ringing, offline.
- In the User Details, fill in the following details:
- User ID - The extension ID you received from the VoipNow server administrator (e.g. 0003*001).
Domain - The server hostname or IP address. If you are using a hostname, you will have to add it in VoipNow as well, more precisely in the Unified Communications → Zero Priority → SIP → Accept SIP requests to domain:port field.
Password - Enter the password set in VoipNow, in the Edit Extension page.
Display name - It can be a name at your choice (e.g. John Doe or Nestor P)
- Leave the options in the Domain Proxy section as they are.
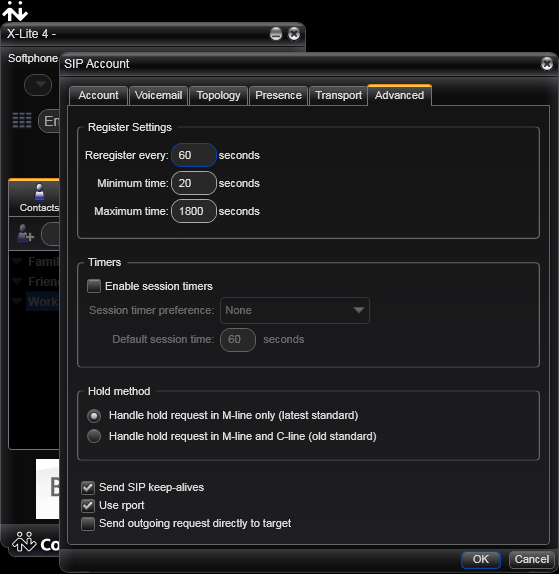
- In the Advanced tab, customize the options under the Register Settings section following the explanations below.
- Reregister every - Set to 60 seconds.
- Minimum time - Leave the default value, 20 seconds.
- Maximum time - Set to 180 seconds.
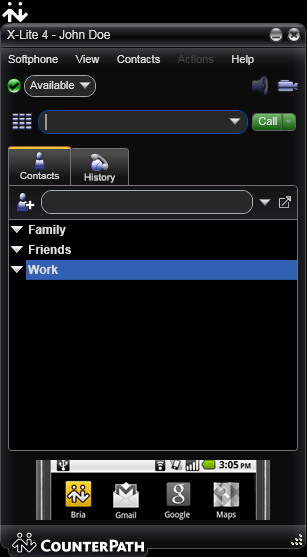
Click OK when you're done. At this point, you should see an output similar to the one below, and you may start dialing.
Related articles
 Except where otherwise noted, content in this space is licensed under a Creative Commons Attribution 4.0 International.